If you check the menu on my website, you’ll find a new section called Photography featuring my photo gallery. I’ve been thinking about adding a page to share more of my photos for a long time. I wanted to create a simple, clean, and easy-to-maintain photo gallery. I found that Astro is a perfect tool for this task.
In this article, I’ll show you how I built a simple photo gallery in a few easy steps.
Before we start
If you follow my blog, you already know it has been running on Astro since last year when I migrated from Gatsby. Gatsby had some good features, too, especially for image optimization, but I found that Astro is much faster and easier to use. And it’s latest version also has excellent support for images.
For this tutorial, I assume you have some familiarity with Astro and Web development in general. If you never tried Astro before, go ahead and check the Getting Started pages to learn more about the framework.
Overview
I’ve started with the simple idea of grouping my photos into albums, each a separate page listing all photos in a grid.
Astro’s content collections are perfect for this task:
Content collections are the best way to manage and author content in any Astro project. Collections help to organize your documents, validate your frontmatter, and provide automatic TypeScript type-safety for all of your content.
In Astro, you can define your content collections as you like. I already use them for my blog post entries (like this one) written in markdown (MDX, actually). For the photo gallery, I decided to add another collection of albums.
Albums content collections
First, let’s start by defining the album collection in ./src/content/config.ts:
import { defineCollection, z } from "Astro:content";

const albums = defineCollection({
  type: "data",
  schema: ({ image }) =>
    z.object({
      title: z.string(),
      description: z.string().optional(),
      cover: image(),
    }),
});

export const collections = {
  albums,
};
This defines the shape of the collection entries that will be used to store information (type: "data") about each album, such as the title, description, and cover image.
I’ve decided to use yaml files for convenience, but other formats like json or toml are also supported.
title: Hiking Trip
description: A bunch of photos from the hiking trip
cover: ./hiking-trip/cover.jpg
Feel free to also create a folder to store your album’s images, throw a bunch of photos in there, and make sure that the cover image is referenced correctly in the album’s yaml file.
After this, your src/content folder structure should look like this:
src
  content/
    albums/
      hiking-trip/
        cover.jpg
        photo1.jpg
        photo2.jpg
        ...
      some-other-album/
        cover.jpg
        photo1.jpg
        photo2.jpg
        ...
    config.ts
That’s it for the album collection. Now, we can move to the next step.
Albums index page
The next step is to create a page that will list all albums.
Create a new file in ./src/pages/gallery.astro. This will be the main gallery page.
Let’s add a component script that goes on top of the file:
---
import { Image } from "Astro:assets";
import { getCollection } from "Astro:content";

const albums = await getCollection("albums");
---

... JSX template goes here ...
This will use built-in Astro’s getCollection function to fetch all albums from the collection and store them in the albums variable provided in the template part.
Now, for the component template (Astro’s JSX-like syntax), we will also be using the built-in <Image /> component to render the cover image.
In my astro templates, I also use some Tailwind CSS, but you can obviously use any CSS framework or write your own styles.
<div class="p-8">
  <h1 class="text-5xl font-bold text-center my-8">Gallery</h1>
  <div class="mx-auto container max-w-screen-sm grid grid-cols-2 gap-8">
    {
      albums.map((item) => (
        <a
          href={`/gallery/${item.id}`}
          class="group transition-all mb-4 block"
        >
          <Image
            src={item.data.cover}
            alt={item.data.title}
            format="avif"
            width={720}
            quality="mid"
            class:list={[
              "rounded-lg transition-all",
              "group-hover:shadow-lg group-hover:opacity-90"
            ]}
          />
          <div class="mt-4 text-center text-neutral-700">
            <strong class="font-normal">{item.data.title}</strong>
            <p class="text-xs">{item.data.description}</p>
          </div>
        </a>
      ))
    }
  </div>
</div>
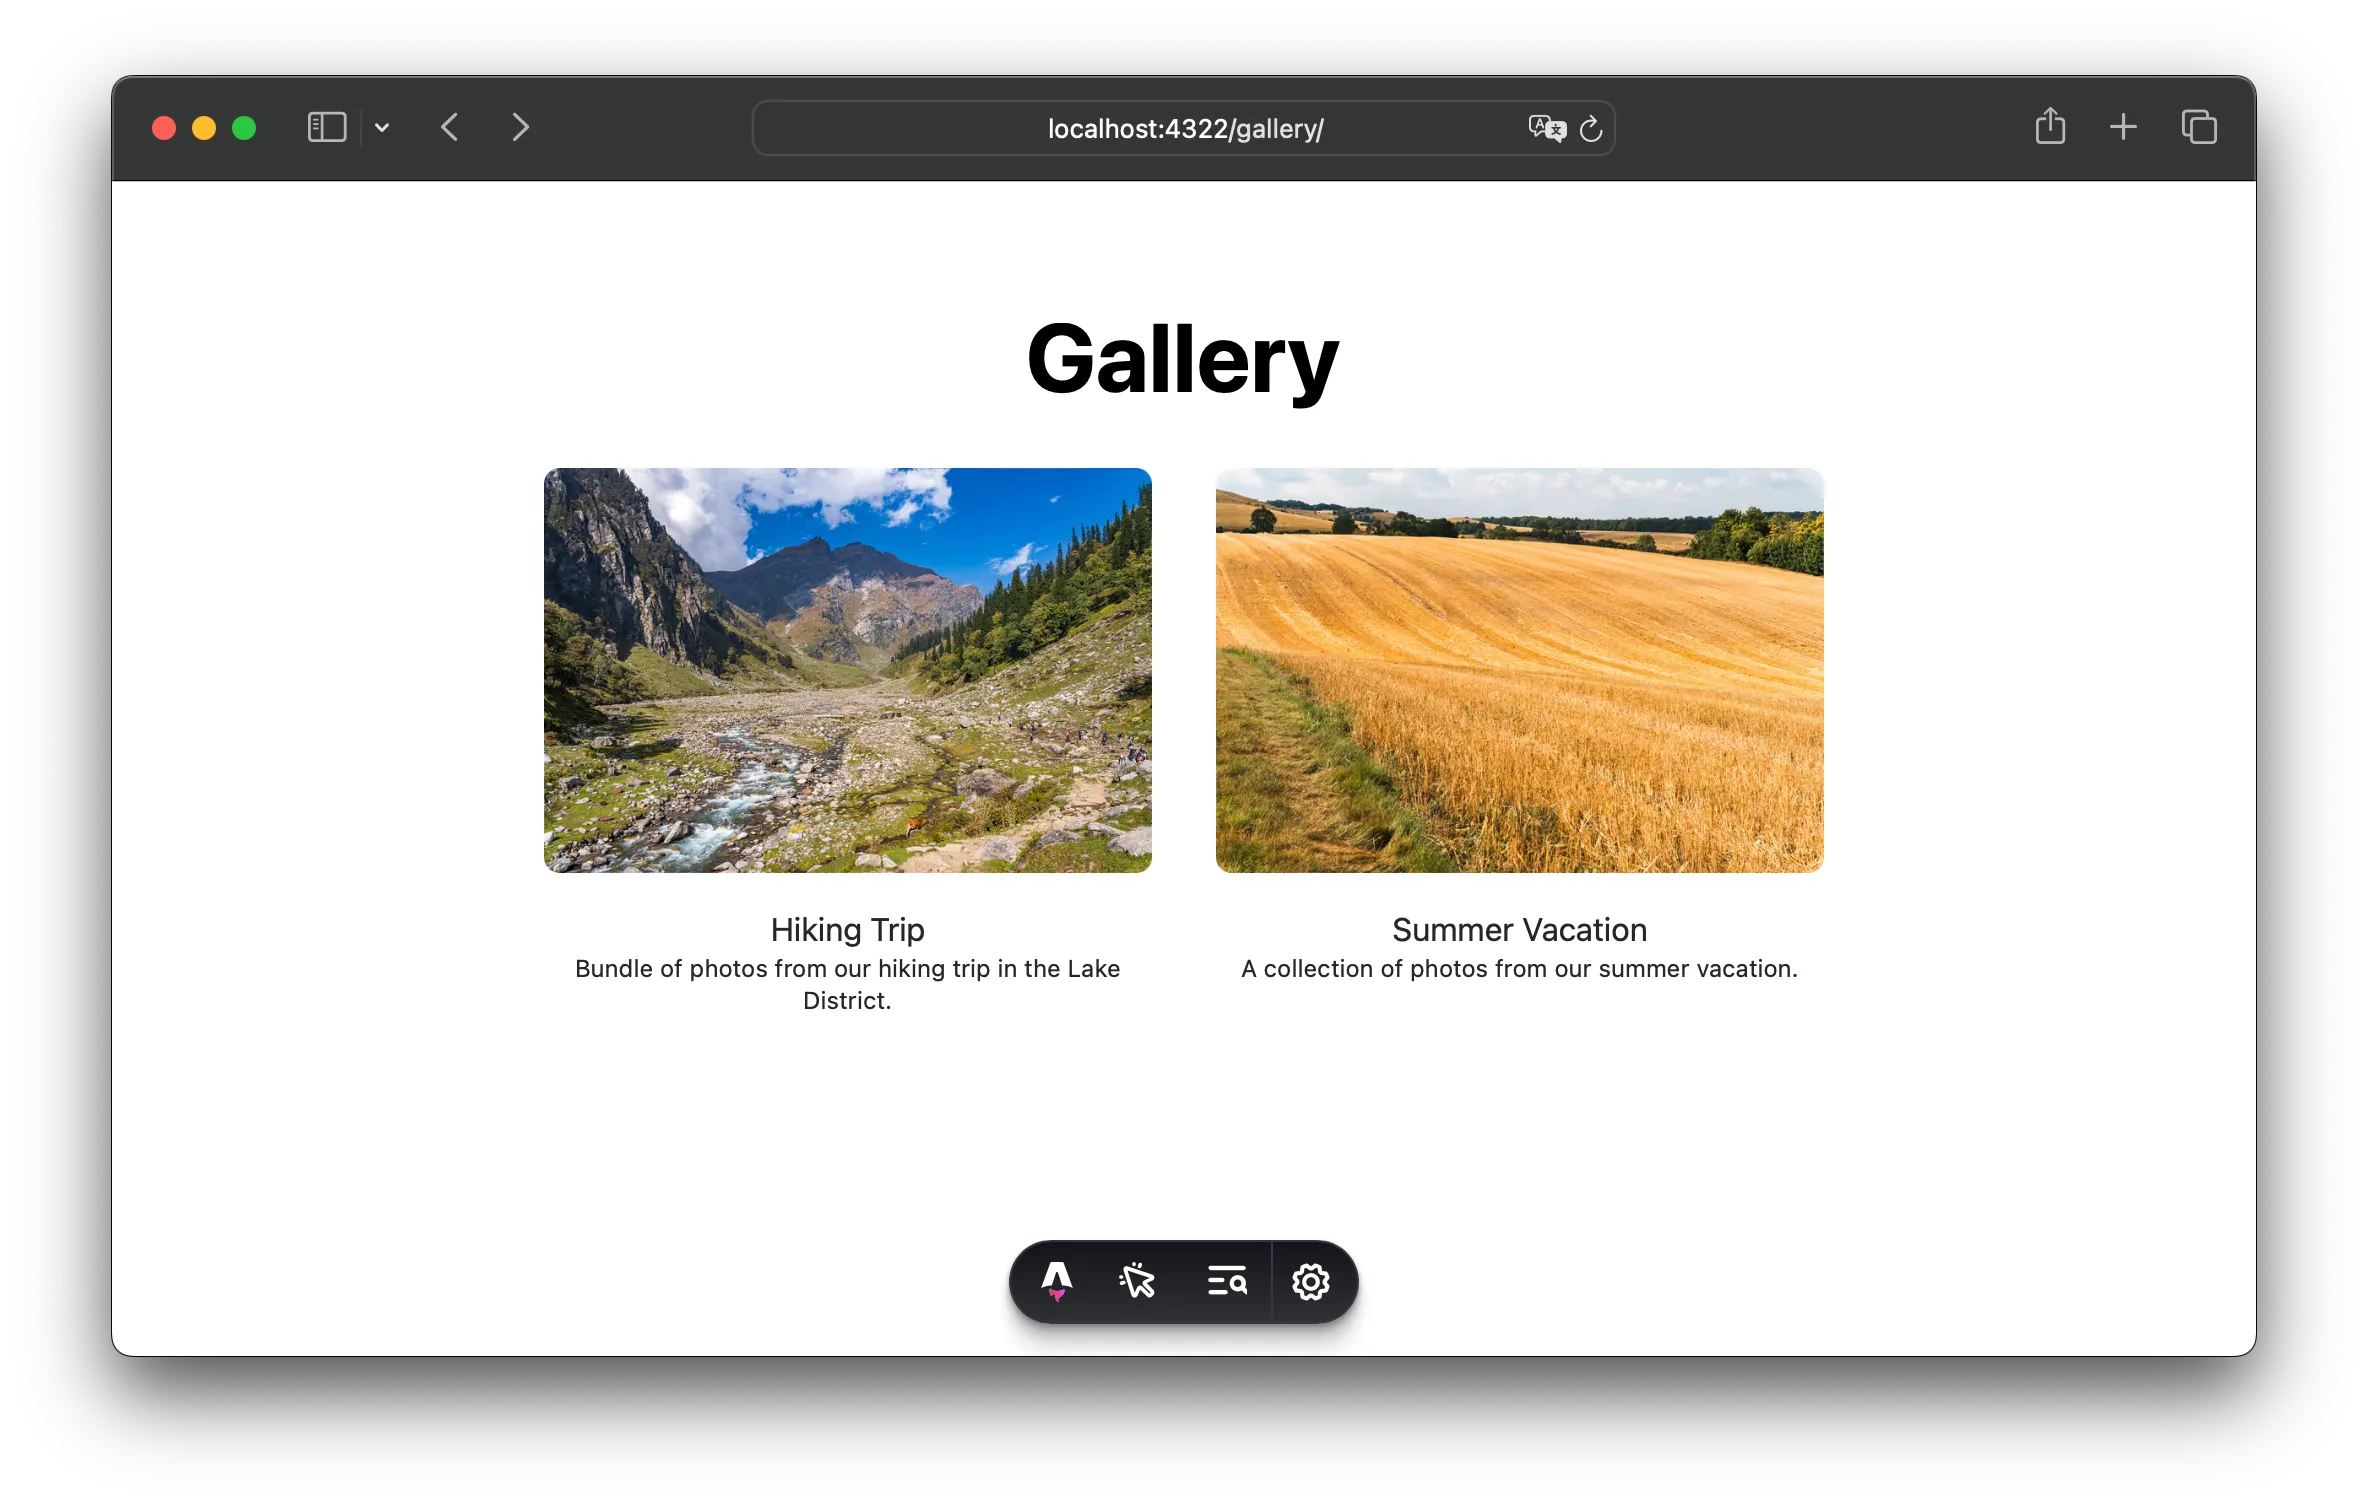
There’s nothing fancy here. It’s just a simple map loop over the album collection, rendering the cover image, title, and description. When you click on the album cover, you’ll be taken to the album page.
Since we’ve declared the album’s cover as image() in the collection schema, we can use it directly in the template without any additional processing.
The <Image /> component will take care of image transformation during build time, generating optimized images in different formats and sizes. You can read more about Astro’s image optimization in the official documentation.
Thats it. This is the main gallery page, listing all albums:
Album view page
The next step is to create an album view page. This page will list all the photos in the album. We’ll use Astro file system routing to create dynamic routes for each album.
Create a new file ./src/pages/gallery/[id].astro.
The [id] part in the file name is a placeholder for the album ID that will be used to fetch album data from the collection.
Since we’re building a static site, we must pre-generate all album pages during build time.
In order to do this, we need to define an export of the getStaticPaths() function in the component script, which returns a list of all page paths (all albums).
---
import { getCollection } from "Astro:content";

export async function getStaticPaths() {
  const albums = await getCollection("albums");

  const paths = Object.values(albums).map((album) => {
    return {
      params: {
        id: album.id,
      },
      props: {
        album,
      },
    };
  });

  return paths;
}

const { album } = Astro.props;
---

... JSX template goes here ...
Again, we’re fetching all items from the "albums" collection and mapping them to an array of paths.
In this case, we’re using album.id as the path identifier for each album. Astro automatically generates IDs for each collection item based on the file name.
The getStaticPaths() tells Astro to pre-generate all album pages during build time, providing album data as props to each page.
The route page is nested in the gallery/ folder, so the result will be a list of routes in the form of /gallery/:id, for example,/gallery/hiking-trip.
Now, we can move to the template part of the component:
<div class="text-center my-16 mb-32">
  <h1 class="text-3xl xl:text-6xl font-bold">
    {album.data.title}
  </h1>
  <p class="text-lg xl:text-2xl my-4">
    {album.data.description}
  </p>

  <div>
    Images go here...
  </div>

  <p class="text-lg my-4 text-center">
    <a href="/gallery/" class="text-white hover:underline"
      >Go back →</a
    >
  </p>
</div>
So far, this should render a simple album page with a title, description, and a link back to the main gallery page. But we still need to do the most important part: render all the photos in the album.
Album photos
We need to fetch all images from the album folder to render all photos in the album. This could be done in many ways. For example, we could extend the collection schema to include a list of images. That could be a good solution if you want to maintain the list of images in the collection file and include some additional metadata like description or ordering.
But in my case, for simplicity, I decided to fetch all images from the album folder and show them on the album page without any additional metadata.
In ./src/utils/albums.ts file, I’ve created a function that fetches all images from the album folder.
export async function getAlbumImages(albumId: string) {
  // 1. List all album files from collections path
  let images = import.meta.glob<{ default: ImageMetadata }>(
    "/src/content/albums/**/*.{jpeg,jpg}"
  );

  // 2. Filter images by albumId
  images = Object.fromEntries(
    Object.entries(images).filter(([key]) => key.includes(albumId))
  );

  // 3. Images are promises, so we need to resolve the glob promises
  const resolvedImages = await Promise.all(
    Object.values(images).map((image) => image().then((mod) => mod.default))
  );

  // 4. Shuffle images in random order
  resolvedImages.sort(() => Math.random() - 0.5);
  return resolvedImages;
}
We’re filtering for album images inside the function because import.meta.glob doesn’t support dynamic parameters.
The function awaits for all image imports to be resolved and then also shuffles them in random order.
Let’s use this function in the album page template to render all images. Update the album page with the following code:
---
import { getAlbumImages } from "../../utils/albums";
import { Image } from "Astro:assets";

export async function getStaticPaths() {
  // ... getStaticPaths function ...
}

const { album } = Astro.props;
const images = await getAlbumImages(album.id);
---

<div class="text-center my-16 mb-32">
  ... album title and description ...

  <div
    class="mx-auto container my-8 sm:columns-2 md:columns-3 lg:columns-4 xl:columns-5"
  >
    {
      images.map((image) => (
        <Image
          src={image}
          alt={`Image from ${album.data.title} album`}
          format="avif"
          quality={50}
          class="rounded mb-4 border border-transparent hover:border-gray-300 transition-all duration-300 ease-in-out hover:shadow-lg"
          loading="lazy"
        />
      ))
    }
  </div>

  ... rest of the page ...

</div>
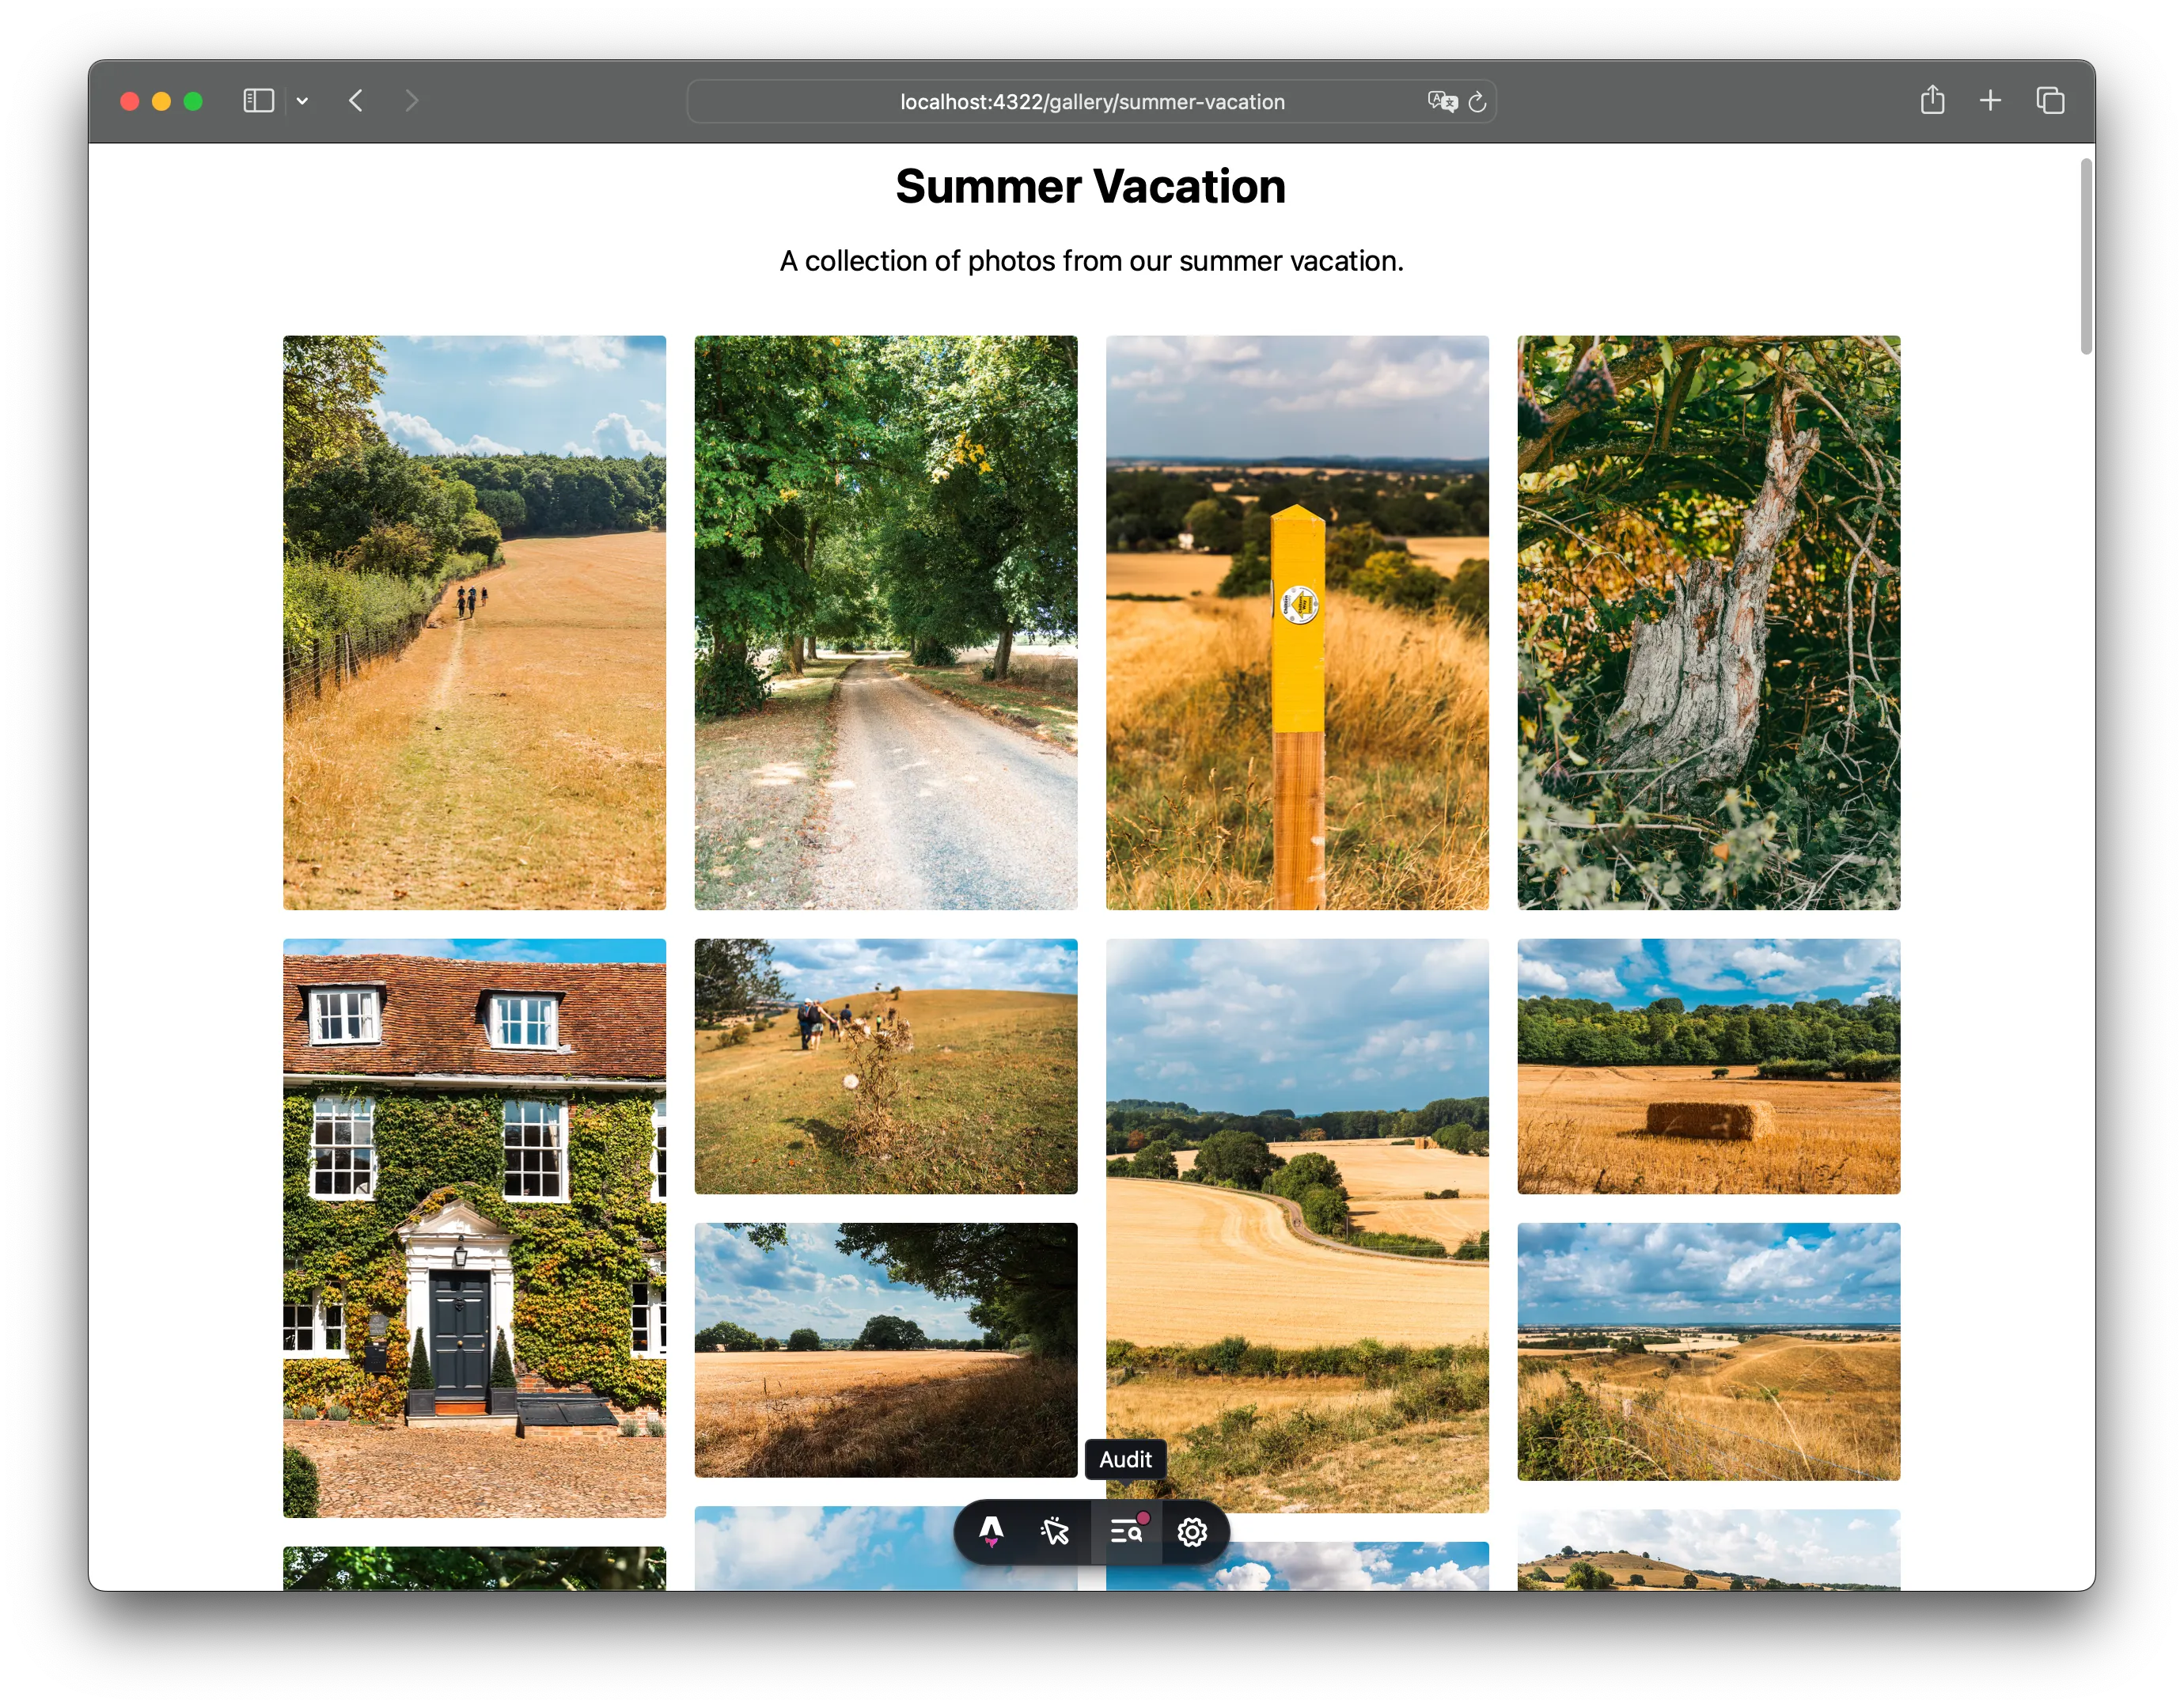
This will render all images from the album in a grid layout using Tailwind Columns utilities.
And that’s it! We’ve just created a simple photo gallery with Astro.
The page may take a while to load on your local machine, especially if you have many images in the album. This is because, in development mode, Astro optimizes images on the fly. Once deployed in production, however, images will be optimized during build time, and the page will load much faster.
Thanks to the Astro <Image> component, images will be automatically optimized for performance and quality (based on the provided parameters).
Conclusion
This is just a simple example of how to build a photo gallery with Astro. From this, we could extend the gallery with more features, like adding a lightbox for full-screen view, reading some image metadata from the files (EXIF data) and displaying it on the album page, or perhaps leveraging some React libraries like React Photo Album or Swiper to build a more advanced gallery.
Note that in our case, we’ve used a simple approach to storing images in the content collection. This means that all photos will be stored in the repository and part of the build process. This should be fine for small/medium galleries (I use it myself here). But if you plan to host hundreds or thousands of photos, you may want to consider using external storage like AWS S3 or Cloudinary and fetching images from there.
I hope you found this article helpful. If you have any questions or suggestions, don’t hesitate to get in touch with me on Twitter. And while you’re here, check out my Photography page to see some of my photos. Let me know what you think!
Thanks for reading!